每个人都喜欢经典游戏。你们还有多少人记得在旧的诺基亚手机中的古老贪吃蛇游戏?我敢肯定你们都记得。这就是为什么这节课我们决定利用HTML5重现它。有一个非常棒的开源游戏框架叫 “Phaser”,我们将会使用这个框架来进行开发。
在下面的教程中,你将了解sprites,游戏状态和如何使用的预加载,创建和更新方法。这是我们正在开发的游戏的最终版本:

安装
下载zip压缩包游戏的文件结构在里面。它包含了游戏所需的所有图像资源,但没有代码。我们接下来将会写这些代码。
现在打开index.html,为页面添加标题并引入所有js文件。以后,玩游戏,只需要在浏览器中打开这个文件。
1
2
3
4
5
6
7
8
9
10
11
12
13
14
15
| <!doctype html>
<html>
<head>
<meta charset="UTF-8" />
<title>Snake</title>
<script src="assets/js/phaser.min.js"></script>
<script src="assets/js/menu.js"></script>
<script src="assets/js/game.js"></script>
<script src="assets/js/game_over.js"></script>
<script src="assets/js/main.js"></script>
</head>
<body>
</body>
</html>
|
你的目录应该看起来像这样:
游戏是如何组织的
Phaser的游戏是围绕状态组织的。认为状态在Phaser中作为一个游戏的不同部分。下面是我们的游戏状态:
- The Menu state。它是由menu.js处理,并且只显示起始图像。当它被点击,游戏转换到游戏状态。
- Game state。它是由game.js处理,这是游戏的实际游戏区域。控制蛇吃苹果,有很多的乐趣。“当你死了” 游戏过渡到Game_Over状态。
- Game_Over state。它显示gameover.png,并显示你的最后得分。当它被点击时返回游戏状态。
main.js是我们主要的JavaScript文件。在这我们创建一个新的游戏实例,并添加一个菜单状态。
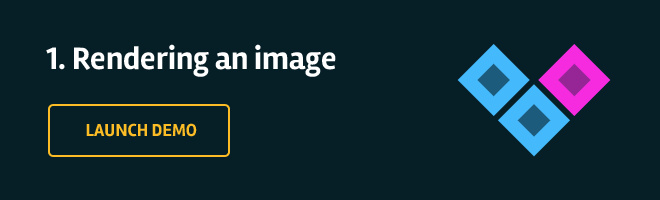
1.加载图片
现在,我们的游戏没有做任何事。让我们来编写Menu state,并使其显示标题画面。
在安装过程中,我们在HTML文件中引入Phaser库。这提供给我们一个Phaser的全局对象。通过它,我们可以访问开发游戏库的方法和功能。
现在,我们将使用全局对象Phaser,创建一个新的游戏实例。它是一个对象,代表了整个游戏的对象。我们将状态添加给它。
main.js
1
2
3
4
5
6
7
8
9
10
| var game;
game = new Phaser.Game(600, 450, Phaser.AUTO, '');
game.state.add('Menu', Menu);
game.state.start('Menu');
|
现在我们需要初始化Menu state对象。在menu.js定义一个新对象并添加如下功能。当启动状态时,预加载函数将被调用,为我们的游戏加载所有需要的资源。一旦完成预加载,创建方法被调用,初始化游戏场景地和我们希望的一切:
menu.js
1
2
3
4
5
6
7
8
9
10
11
12
13
14
15
16
| var Menu = {
preload : function() {
game.load.image('menu', './assets/images/menu.png');
},
create: function () {
this.add.sprite(0, 0, 'menu');
}
};
|
由于浏览器的安全限制,要开始游戏需要在本地运行一个Web服务器。这个Phaser文档页面介绍有所有操作系统的web环境–这里。换句话说,如果你简单地双击index . html它是不会工作。
如果一切都已经正确完成,那么一个开始屏幕的页面应该出现在您的浏览器上了。
2.绘制蛇
正如我们前面提到的,Game state记录着实际运行中的游戏状态,同时我们也在这里写下绘制蛇的方法。就像我们做的Menu state,需要在 main.js 在全局游戏对象中注册 Game state。下面是你的代码应该是什么样子:
main.js
1
2
3
4
5
6
7
8
9
10
11
12
13
| var game;
game = new Phaser.Game(600, 450, Phaser.AUTO, '');
game.state.add('Menu', Menu);
game.state.add('Game', Game);
game.state.start('Menu');
|
我们还需要在menu.js中添加一些代码,实现当被点击时开始Game state。为了这个目的,我们将用一个按钮来代替精灵。添加一个按钮和添加一个精灵基本上是相同的,你只需要提供一个函数当它被点击时调用。
menu.js
1
2
3
4
5
6
7
8
9
10
11
12
13
14
15
16
17
18
19
20
21
22
23
24
| var Menu = {
preload : function() {
game.load.image('menu', './assets/images/menu.png');
},
create: function () {
this.add.button(0, 0, 'menu', this.startGame, this);
},
startGame: function () {
this.state.start('Game');
}
};
|
现在我们可以继续编写的 Game state和绘制蛇。该结构类似于Menu state。
game.js
1
2
3
4
5
6
7
8
9
10
11
12
13
14
15
16
17
18
19
20
21
22
23
24
25
26
27
28
29
30
31
32
33
34
35
36
37
38
39
40
41
42
43
44
45
46
47
48
49
50
51
52
53
54
55
56
57
58
59
60
61
62
63
64
65
66
67
68
69
70
71
72
73
74
75
76
77
78
79
80
| var snake, apple, squareSize, score, speed,
updateDelay, direction, new_direction,
addNew, cursors, scoreTextValue, speedTextValue,
textStyle_Key, textStyle_Value;
var Game = {
preload : function() {
game.load.image('snake', './assets/images/snake.png');
game.load.image('apple', './assets/images/apple.png');
},
create : function() {
snake = [];
apple = {};
squareSize = 15;
score = 0;
speed = 0;
updateDelay = 0;
direction = 'right';
new_direction = null;
addNew = false;
cursors = game.input.keyboard.createCursorKeys();
game.stage.backgroundColor = '#061f27';
for(var i = 0; i < 10; i++){
snake[i] = game.add.sprite(150+i*squareSize, 150, 'snake');
}
this.generateApple();
textStyle_Key = { font: "bold 14px sans-serif", fill: "#46c0f9", align: "center" };
textStyle_Value = { font: "bold 18px sans-serif", fill: "#fff", align: "center" };
game.add.text(30, 20, "SCORE", textStyle_Key);
scoreTextValue = game.add.text(90, 18, score.toString(), textStyle_Value);
game.add.text(500, 20, "SPEED", textStyle_Key);
speedTextValue = game.add.text(558, 18, speed.toString(), textStyle_Value);
},
update: function() {
},
generateApple: function(){
var randomX = Math.floor(Math.random() * 40 ) * squareSize,
randomY = Math.floor(Math.random() * 30 ) * squareSize;
apple = game.add.sprite(randomX, randomY, 'apple');
}
};
|
下面是蛇和苹果展示:

3. 运动与控制
我们通过game.js文件中的update方法来让蛇移动。
首先,我们需要创建一个事件侦听器,用于通过光标键控制蛇的运动方向。
实际的运动有点复杂,因为update方法会以一个非常快的速度触发,如果我们每一次都调用方法去移动蛇的位置,那么它最终会成为一个速度极快且失控的爬行动物。要改变这一点,我们创建一个 if 条件语句,用一个计数器变量updateDelay 来检查这个是否是连续的第10次update()调用。(就类似 if (updateDelay % 10 == 0 ){ 做些什么 } )。
如果到达连续的第10次调用,我们删除蛇的最后一个方块(栈的第一个元素),根据运动方向创建一个新坐标并把它放在蛇头的前面(栈的顶部)。代码如下所示:
1
2
3
4
5
6
7
8
9
10
11
12
13
14
15
16
17
18
19
20
21
22
23
24
25
26
27
28
29
30
31
32
33
34
35
36
37
38
39
40
41
42
43
44
45
46
47
48
49
50
51
52
53
54
55
56
57
58
59
60
61
62
63
64
65
66
67
68
69
70
71
72
73
74
75
76
77
78
79
80
81
82
83
84
| update: function() {
if (cursors.right.isDown && direction!='left')
{
new_direction = 'right';
}
else if (cursors.left.isDown && direction!='right')
{
new_direction = 'left';
}
else if (cursors.up.isDown && direction!='down')
{
new_direction = 'up';
}
else if (cursors.down.isDown && direction!='up')
{
new_direction = 'down';
}
speed = Math.min(10, Math.floor(score/5));
speedTextValue.text = '' + speed;
updateDelay++;
if (updateDelay % (10 - speed) == 0) {
var firstCell = snake[snake.length - 1],
lastCell = snake.shift(),
oldLastCellx = lastCell.x,
oldLastCelly = lastCell.y;
if(new_direction){
direction = new_direction;
new_direction = null;
}
if(direction == 'right'){
lastCell.x = firstCell.x + 15;
lastCell.y = firstCell.y;
}
else if(direction == 'left'){
lastCell.x = firstCell.x - 15;
lastCell.y = firstCell.y;
}
else if(direction == 'up'){
lastCell.x = firstCell.x;
lastCell.y = firstCell.y - 15;
}
else if(direction == 'down'){
lastCell.x = firstCell.x;
lastCell.y = firstCell.y + 15;
}
snake.push(lastCell);
firstCell = lastCell;
}
}
|
尝试通过键盘上的方向键控制蛇。

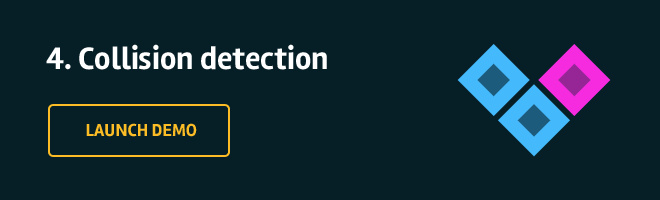
4. 碰撞检测
游戏中蛇是在赛场上可以无拘束的自由移动不是一件有趣的事。我们需要检测何时蛇与墙壁,苹果或自己接触。这就是所谓的碰撞检测。
碰撞检测通常是使用物理引擎来完成,Phaser框架对此支持的很少。像这样一个简单的游戏用物理引擎太复杂了。我们转而通过比较坐标的方式来做我们自己的碰撞检测。
在update方法中,移动蛇的位置代码后,我们调用了一些方法。它们会比较坐标如果发生碰撞会通知我们。
1
2
3
4
5
6
7
8
9
10
11
12
13
14
15
16
17
18
19
20
21
22
23
24
25
26
27
28
29
30
31
32
33
34
35
36
37
38
39
40
41
42
43
44
45
46
47
48
49
50
51
52
53
54
55
56
57
58
59
60
61
62
63
64
65
66
67
68
69
70
71
72
73
74
75
76
77
78
79
80
81
|
update: function() {
if(addNew){
snake.unshift(game.add.sprite(oldLastCellx, oldLastCelly, 'snake'));
addNew = false;
}
this.appleCollision();
this.selfCollision(firstCell);
this.wallCollision(firstCell);
}
},
appleCollision: function() {
for(var i = 0; i < snake.length; i++){
if(snake[i].x == apple.x && snake[i].y == apple.y){
addNew = true;
apple.destroy();
this.generateApple();
score++;
scoreTextValue.text = score.toString();
}
}
},
selfCollision: function(head) {
for(var i = 0; i < snake.length - 1; i++){
if(head.x == snake[i].x && head.y == snake[i].y){
game.state.start('Game_Over');
}
}
},
wallCollision: function(head) {
if(head.x >= 600 || head.x < 0 || head.y >= 450 || head.y < 0){
game.state.start('Game_Over');
}
}
|
当蛇与苹果碰撞,我们增加的分和蛇的长度。但是,当与墙或蛇体发生碰撞时,就要结束游戏。要做到这一点,我们需要在main.js中注册Game_Over state。加入这行代码到文件的底部:
main.js
1
| game.state.add('Game_Over', Game_Over);
|
game_over.js
1
2
3
4
5
6
7
8
9
10
11
12
13
14
15
16
17
18
19
20
21
22
23
24
25
26
| var Game_Over = {
preload : function() {
game.load.image('gameover', './assets/images/gameover.png');
},
create : function() {
this.add.button(0, 0, 'gameover', this.startGame, this);
game.add.text(235, 350, "LAST SCORE", { font: "bold 16px sans-serif", fill: "#46c0f9", align: "center"});
game.add.text(350, 348, score.toString(), { font: "bold 20px sans-serif", fill: "#fff", align: "center" });
},
startGame: function () {
this.state.start('Game');
}
};
|
就是这样!我们游戏已经准备好了!
延伸阅读
我们希望你喜欢这个简单的小游戏,并通过我们的教程学到很多东西,更多关于Phaser的链接:
Phaser’s official introduction tutorial
Phaser live coding sandbox
Gallery with practical examples
原文链接:Making Your First HTML5 Game With Phaser


